Adjustment of idling and CO content in exhaust gases
Warm up the engine to operating temperature. connect gas analyzer and tachometer. Set the crankshaft speed to 3000 rpm. hold it for about 30 seconds and slow down to idle speed. After the arrows of the instruments calm down, take readings of the CO content and the crankshaft speed. If necessary, adjust the speed with a screw of quantity 1 (fig.2.91).
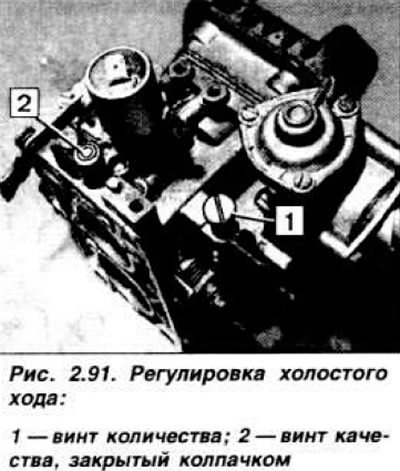
In case of high CO content, remove the air filter and use a narrow-bladed screwdriver to remove the safety cap 2 quality screws. Raise the speed to 3000 rpm. reset them to idle and within 30 s. by turning the quality screw, adjust the CO content in the exhaust gases. If the adjustment took more than 30 s. repeat the operation. Install a new safety cap on the quality screw and air filter and check the idle speed and CO content again.
Checking and adjusting the fuel level in the float chamber
Remove the carburetor, unscrew the six screws and remove the carburetor cover. Disconnect the link from the automatic starter. Holding the lid vertically, measure the distance between the lid gasket and the bottom of the float (pic. 2.92).
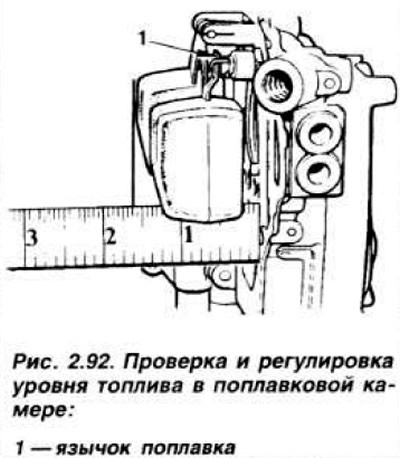
If necessary, bend the float tongue. Connect the pull rod to the starting device and install the carburetor cover.
Fast idle adjustment
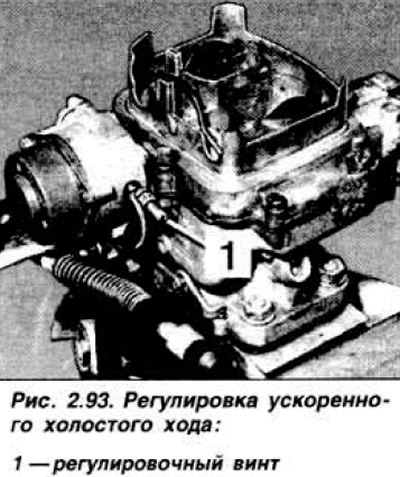
Warm up the engine to operating temperature and connect the tachometer. Stop the engine, remove the air filter. While holding the throttle valve of the first chamber in a partially open position, close the air dampers. Release the accelerator pedal; the starting device must be in the fast idle position. Release the air dampers without touching the accelerator pedal. Start the engine and read the tachometer. After releasing the air dampers, they should take the position of full opening, if this does not happen, then either the engine is not warm enough, or the starting device is faulty. Adjustment of accelerated idling 2700 rpm is carried out by screw 1 (pic. 2.93) after releasing the locknut. Install the air filter after adjustment.
Air flap adjustment
Disconnect the negative cable from the battery and remove the air filter. Disconnect the cable from the automatic starter. Unscrew the three mounting screws and remove the bimetallic spring housing and the internal heat-insulating nut. Put a rubber ring on the air damper drive lever and the carburetor housing to hold the dampers in the closed position (pic. 2.94).

Then open the air dampers and release the accelerator pedal. Unscrew and remove the plug of the air damper pneumatic drive, use a screwdriver to sink the plunger to the stop and use a round gauge or a 5.2-5.8 mm drill to measure the opening of the air damper. To adjust this value, turn adjusting screw 2.
Adjustment of the automatic starter
With the throttle valve of the first chamber slightly open, turn cam 1 (pic. 2.95) throttle control so that its protrusion rests on the adjusting screw 2.
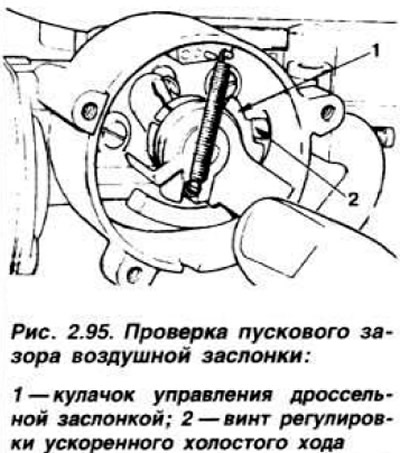
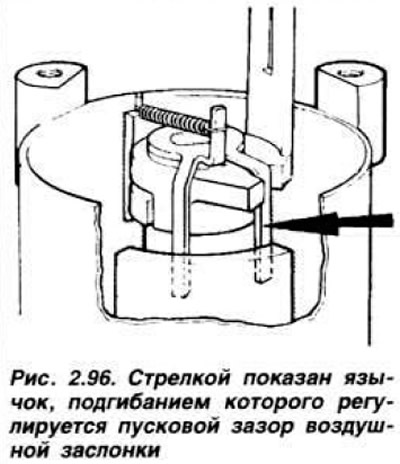
Release the accelerator pedal to lock the cam in this position. Close the air dampers until the lobe of the cam stops against the adjusting screw, as shown in the figure. Using a round gauge or drill 1.5-2.5 mm, measure the gap between the wall of the mixing chamber and the edge of the air damper of the first chamber. If necessary, adjust the gap by bending the tongue (pic. 2.96).
Visitor comments