Withdrawal
Disconnect the electrical connector from the fluid level sensor located in the filler cap of the brake fluid reservoir. Remove the cover. Drain the brake fluid from the reservoir.
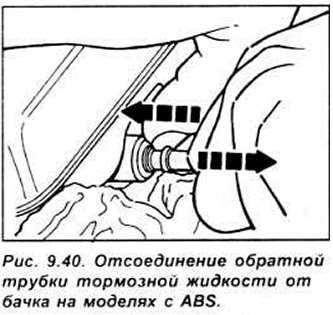
Mark the brake pipes suitable for the main brake cylinder. Unscrew the connecting nuts from the brake cylinder and disconnect the brake pipes. On vehicles equipped with an ABS system, when disconnecting the return pipes from the tank, press the latch to the tank and remove the pipe (see fig. 9.40). Close tubes with stoppers.
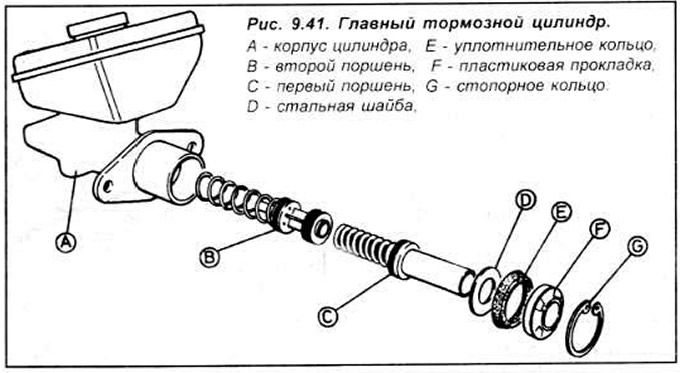
Unscrew nuts and remove the main brake cylinder from the vacuum booster.
Disassembly
Clean the outer surface of the brake master cylinder.
Secure the master cylinder in a soft jaw vise.
Remove the brake fluid reservoir from the top of the brake master cylinder by pulling it towards you.
Remove the reservoir o-ring from the top of the brake master cylinder.
Remove the circlip from the groove at the rear of the brake master cylinder.
Pull the first piston off the back of the cylinder along with the gasket, o-ring and steel washer.
Remove the second piston from the cylinder.
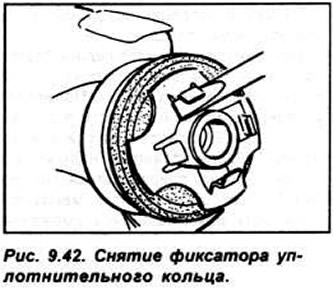
To disassemble the first piston and replace the O-ring, remove the spring from the piston. Using a screwdriver, remove the latch and O-ring (see fig. 9.42, 9.43).
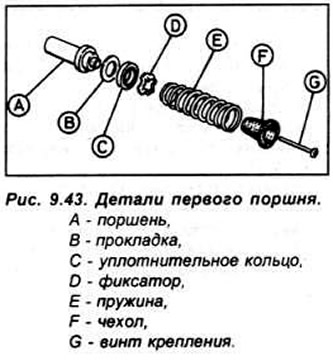
To disassemble the second piston, remove the spring, retainer and, using the same method as for the first piston, remove the o-ring (see fig. 9.44).

Wash all parts of the brake master cylinder in methanol or clean brake fluid. Inspect cylinder parts for wear and damage.
Lubricate the cylinder parts with brake fluid. Assemble each piston in the reverse order of disassembly. Check that the O-rings are installed correctly and securely fastened with retainers.
Lubricate the pistons and install them in the brake master cylinder by pushing in and turning them around the axle at the same time. After installing the pistons in the cylinder, install a steel washer, a new o-ring, a gasket and secure them with a retaining ring.
Installation
Clean the mating surfaces of the brake master cylinder and brake booster. Installation is made in sequence, return to removal.
Visitor comments