Removing the fan
SEQUENCE OF WORK
1. If the fan does not work, first check the fan fuse under the instrument panel (fuse number 16).
2. If the fuse is good, check the fan switch. To do this, the control unit must be removed.

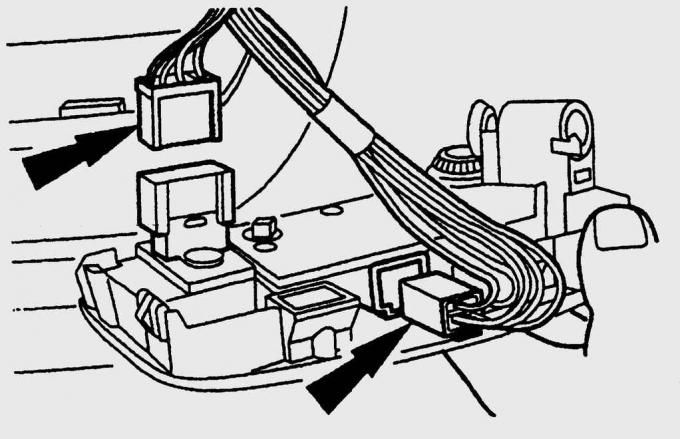
Pic. 16.6. Location of universal connector (up) fan switch
3. Disconnect the universal connector from the switch and check for voltage on its contacts (pic. 16.6). If there is no voltage, check the condition of the wire from the fuse box.
4. Using a universal measuring device, check the operation of the contact groups in all switch positions.
5. It is better to replace a faulty switch, as practice shows that it makes no sense to repair a faulty switch.

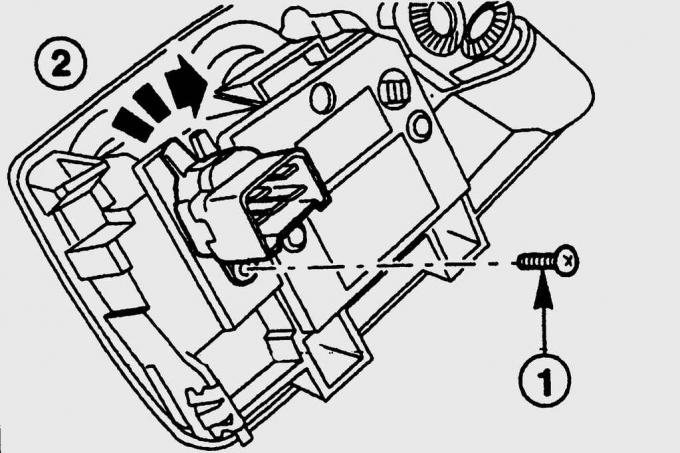
Pic. 16.7. Bolt location (1) switch mounting and turning direction (2) while pressing to remove the switch from the control box
6. Turn out a bolt of fastening of the switch, press and at the same time turn the switch clockwise, remove it from the control box (pic. 16.7).
7. If the switch is OK, check the connection to «weight» fan motor.
8. If connection with «weight» reliable, it means that the fan motor is faulty (burnt carbon brushes or shorted armature windings). We recommend having the electric motor replaced by a workshop.
Visitor comments