2. In the absence of a stand, you can disassemble the engine by fixing it on a solid workbench, or on the ass. Be extremely careful not to overturn the engine.
3. If you are going to purchase a remanufactured engine, all external components must be removed first in order to install them on such an engine. These nodes include the following:
- A) Generator and brackets (chapter 5A)
- b) High voltage wires and spark plugs (Chapter 1 and 5B)
- V) Thermostat and its body (chapter 3)
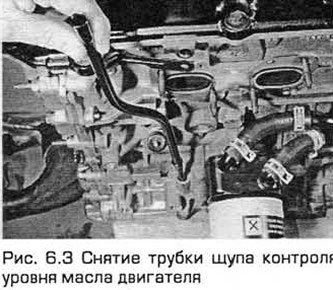
- G) Oil dipstick socket (see fig.6.3).
- d) Fuel Injection System Components (chapter 4)
- e) All electrical switches and sensors (see relevant chapter)
- and) intake and exhaust manifolds (chapter 2A or 2B)
- h) Oil filter (Chapter 1).
- And) Power unit support brackets (chapter 2A or 2B)
- To) Handwheel/faceplate (chapter 2A or 2B).
Note: When removing units and parts from an old engine, note everything that may be useful in the future during assembly: where and how gaskets, o-rings, spacers, pins, washers, bolts and other important "little things".

4. If you purchased an engine assembly kit containing a cylinder block / crankcase, crankshaft and connecting rod and piston groups, then you must also remove the block head, sump, oil pump and toothed belt from the old engine (4 cylinder engines) or chains (V-shaped 6-cylinder engines) gas distribution mechanism.
5. If you decide to repair the engine yourself, then disassemble the engine and remove the external components in the following order:
- A) intake and exhaust manifolds (chapter 2A or 2B).
- b) Toothed belt and toothed pulleys (4-cylinder engines) or chains (V-shaped 6-cylinder engines) gas distribution mechanism (chapter 2A or 2B).
- V) Head (And) cylinder block (chapter 2A or 2B).
- G) Handwheel/faceplate (chapter 2A or 2B).
- V) Pallet (chapter 2A or 2B).
- e) Oil pump (chapter 2A or 2B).
- and) Connecting rod and piston groups (paragraph 13)
- h) Crankshaft (paragraph 11).
6. Before starting disassembly and repair, you must purchase the appropriate equipment.
Visitor comments