Note: Before starting this procedure, you should already have spare parts. At the time of writing this manual, generator components are not available separately as spare parts. At the same time, spare parts such as brushes can be purchased from auto electricians.
1. Remove the alternator from the vehicle (paragraph 5) and place it on a clean workbench.
Bosch generator
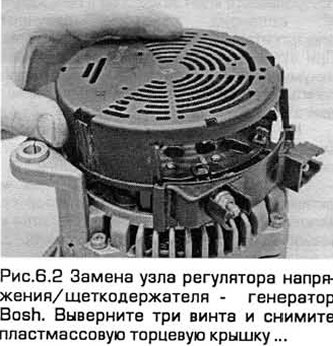
2. Remove the three screws and remove the plastic end cap (see fig. 13.2).
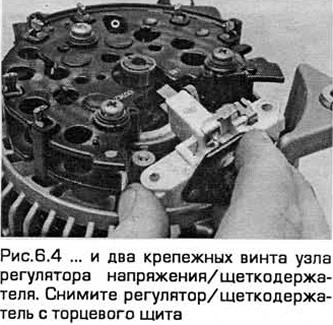
3. Remove the two mounting screws of the voltage regulator/brush holder assembly.
4. Remove regulator/brush holder from end shield (see fig. 6.4).
Motorcraft generator
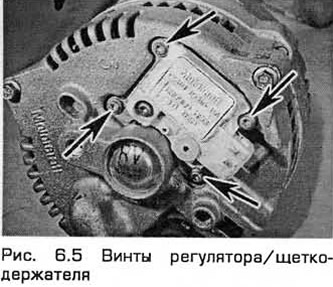
5. Remove the slotted screws. Remove the regulator/brush holder from the back of the generator (see fig. 6.5).
All types of generators
6. Measure the protrusion of each brush and compare these values with the minimum value indicated in Technical requirements. If this parameter on one of the brushes is less than regulated, replace the assembly.
7. Make sure each brush moves smoothly in the brush holder.
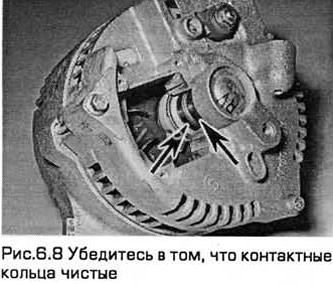
8. Make sure the slip rings (copper rings on which the brushes rest) clean (see fig.6.8) . Clean them with a cloth soaked in solvent. If any of the rings is scuffed or blackened, then the generator must be shown to a specialist.
Bosch generator
9. Install the voltage regulator/brush holder so that the brushes properly mate with the slip rings and are clamped in their bearings. Tighten the screws securely.
10. Install the end cap and tighten the screws securely.
Motorcraft generator
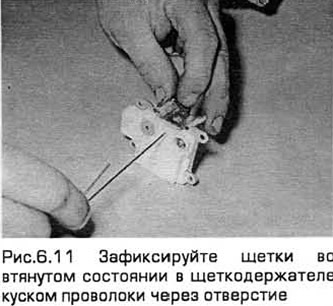
11. Gently press the brushes into the brush holder and secure them with a piece of wire through the hole (see fig.6.11).
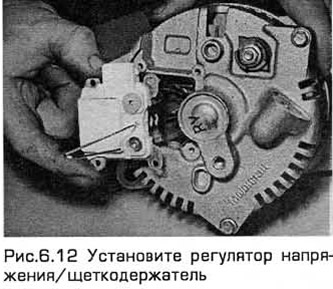
12. Install voltage regulator/brush holder. Tighten the screws securely (see fig.6.12).
All types of generators
13. Install the generator (paragraph 5).
Visitor comments