Digital clock
See position 18 in paragraph 2.
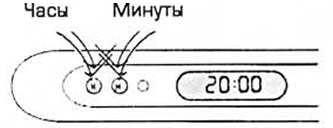
The clock displays the time when the ignition is on. They can operate in 12- or 24-hour mode and also display the outside temperature.
To change the time display mode 12/24, you need to press two buttons at the same time, then release them. To set the time: the clock changes when the button is pressed «H», minutes - «M». For fast translation, the button must be held until the desired time is set.
Multifunction digital display
Warning: To ensure safety, the modes should only be changed while stationary.
The multifunctional digital display shows the following parameters:
- Time
- Number
- Stopwatch
- Outdoor temperature
Buttons
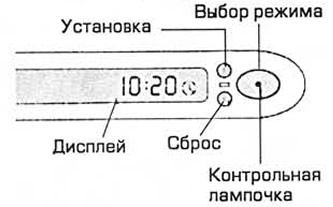
Mode select button
By pressing this button, you can exit to any of the possible modes. The mode is shown on the display.
Install button (S)
With this button, you can set the time and date on the display, turn on and set the stopwatch, determine the temperature in degrees Celsius and Fahrenheit.
Reset button (R)
With it, you can reset the stopwatch, as well as set the time and date on the display.
Clock setting
Any setting takes place only when the ignition is on. Use the mode select button to set the display to the time mode.
After that press the button «S» (when 12 hour mode is selected): clock show «DM» (before noon) And «RM» (afternoon). To select 24-hour mode or return to 12-hour mode, press the button «th».
After selecting the mode, you can proceed to setting the time. To do this, press the button 2 times «S» - the hour digit flashes. Then select the current hour by pressing the button «R».
Press the button 3 times to set the minutes «S» - the corresponding number flashes. Pushing a button «R», select the current minutes. Press the mode button again to complete the setting.
Date setting
The date is also set only when the ignition is on. Use the mode select button to set the display to date mode. Then press the button «S» - The month digit flashes. With button «R» set the current month.
To set the day, press the button «S» twice. Also select the current day with the button «R».
Press the mode button again to complete the setting.
Stopwatch
Use the mode select button to set the display to stopwatch mode. With button «S» you can start and stop the stopwatch. To reset it, press the button «R».
To select other functions while the stopwatch is running, use the mode select button. The stopwatch symbol will flash.
Outdoor temperature display
Press the mode selection button to set the outdoor temperature mode on the display. With button «S» You can choose the scale - C or F.
On-board computer
See position 19 in paragraph 2.
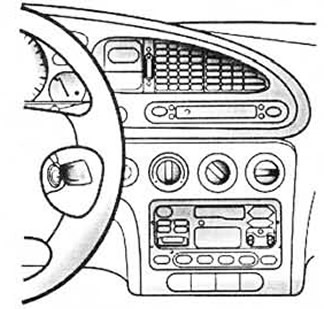
Warning: To ensure safety, the modes should only be changed while stopped.
The on-board computer displays the following parameters:
- Mileage
- average speed
- Instant fuel consumption
- Average fuel consumption
- Power reserve
Buttons
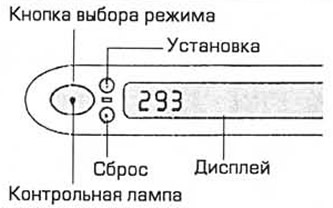
Mode select button
By pressing this button, you can exit to any of the possible modes.
Install button (S)
With this button you can change the units to metric/imperial.
Reset button (R)
This button resets all computer modes.
Odometer since reset

The odometer records the distance traveled since the last reset up to 999 km or miles. To reset the readings, press the button «I».
Average speed
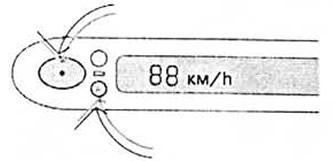
By pressing the mode button, you can determine the average speed for the last 100 km or since the last reset.
Instant fuel consumption
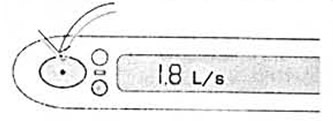
By selecting the desired mode using the corresponding button, you can determine the instantaneous fuel consumption. The on-board computer instantly captures and registers changes in the driving mode, displaying readings on the display.
Average fuel consumption
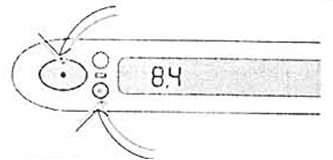
By setting the appropriate mode, you can find out the average fuel consumption since the last reset. This mode can be activated at any time, for example, after refueling or before driving.
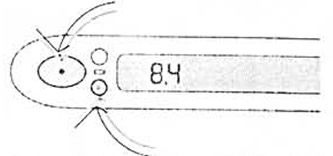
To reset the reading, use the select button to set the average fuel consumption mode, then press the reset button «R».
Power reserve
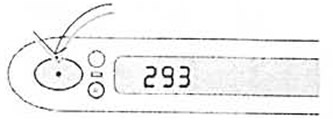
The display can show the distance the vehicle can travel with the amount of fuel it has. Changes in driving conditions also cause changes in readings. When the distance decreases to 80, 40, 20 and 0 km, a warning sound will sound. To turn it off, you need to press one of the buttons on the computer.
Visitor comments