Cable operated models
1. If you are checking after installing a new cable, depress the pedal fully 10 times first.
2. Fully depress and keep the pedal depressed. Install a steel ruler on the partition and measure the distance to the middle of the rubber pad (size C).
3. Release the pedal and measure the distance from the baffle to the middle of the rubber pad (size B). Do not move the pedal while measuring.
4. Pedal travel A \u003d B - C, where size B (pedal released), size C (pedal depressed). See fig. 3.4.
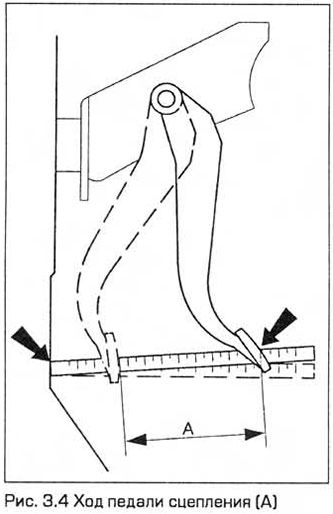
5. Compare the pedal stroke with the regulated value (see Technical Requirements). If necessary, make adjustments as follows.
6. Remove the air cleaner (chapter 4A).
7. Loosen the lock nut on the clutch cable adjuster bushing, which is located next to the release lever on the transmission. Turn the nut until the pedal stroke is normal (see fig. 3.7).
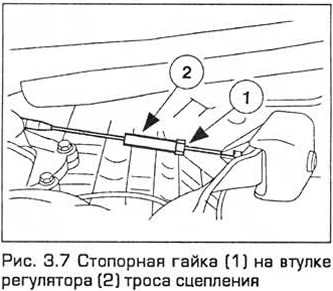
8. Finally tighten the lock nut.
Models with hydraulic drive
9. Turn the steering wheel from the straight ahead position 30°to the left. Fasten the end of the tape measure (tie it with tape) on the clutch pedal. Make sure that the end of the tape measure does not move during measurements.
10. Without touching the pedal, measure the distance (size "WITH") from the pedal to the steering wheel rim on the driver's side (see fig.3.10).
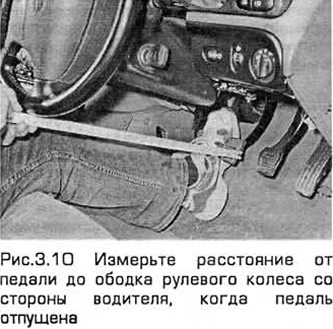
11. Depress the pedal to the stop and measure the distance again (size "IN") In the same place (see figure 3.11.).
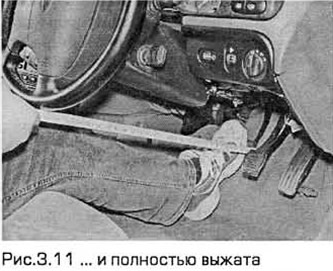
12. Pedal travel A \u003d B - C, where size B (pedal depressed), size C (pedal released).
13. Compare the pedal stroke with the regulated value (see Technical Requirements). If necessary, make adjustments as follows.
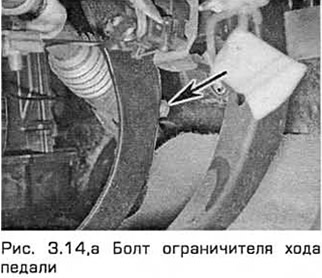
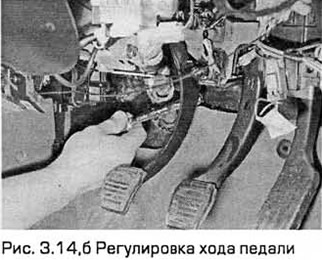
14. Loosen the lock nut on the clutch travel stop (on the master cylinder bracket). Turn the limiter bolt until the pedal travel is normal (see fig. 3.14, a, b). Finally, tighten the lock nut.
Visitor comments