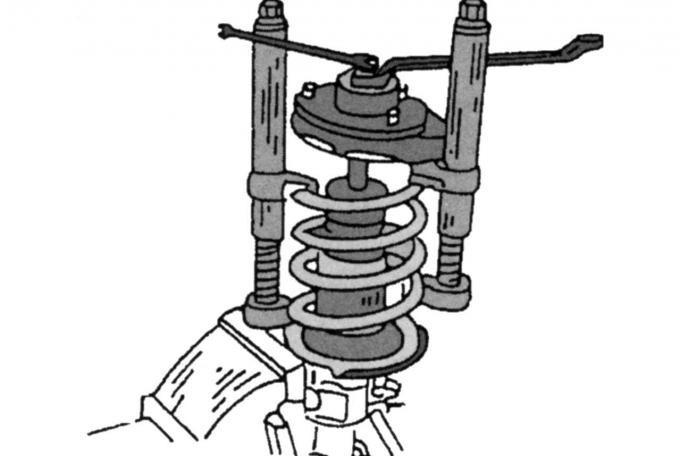
Pic. 203. Ties for compression of the front springs
To dismantle the shock absorber, use the spring ties shown in fig. 203.
Remove the front springs as follows:
- clamp the shock absorber in a vise and compress the spring;

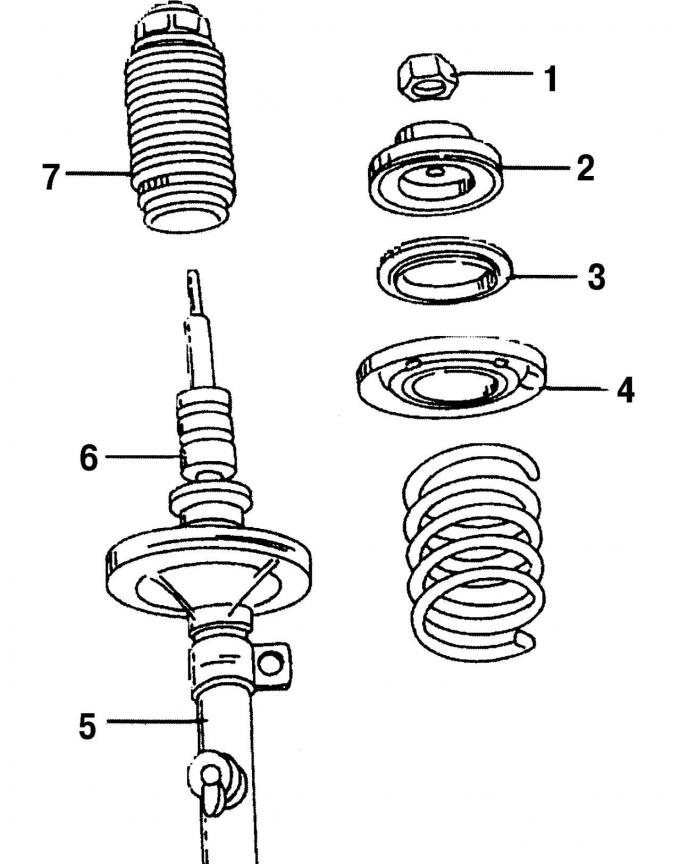
Pic. 204. Details of the shock absorber strut: 1 - nut, 60 Nm; 2 — the top bearing of a rack; 3 - thrust bearing; 4 - spring support; 5 - shock absorber; 6 - rubber compression buffer; 7 - protective cuff
- unscrew the nuts from the bearings of the shock absorber strut and remove a series of parts in sequence (pic. 204), which became free - the upper and thrust bearings, the spring seat and the clamped spring;
- Remove the protective cuff and rubber compression buffer.
Before you remove the spring, remember how it is located in the upper and lower supports. If one of the springs is fatigued, replace both springs.
Install in the reverse order of removal, taking into account the following:
- be sure to install all parts on the shock absorber in the sequence shown in fig. 204;
- nut 1 is tightened with a torque of 60 Nm;
- before assembling the parts, make sure that the coil spring is exactly located in the upper and lower supports;
- Correctly orient the ends of the springs in the spring supports.
Visitor comments