Disconnect the ground wire (-) from the battery.
Attention! As a result, data in electronic storage devices, such as an engine fault memory or a radio code, are erased. Please read the section carefully "Removing and installing the battery", before disconnecting it.
Examination

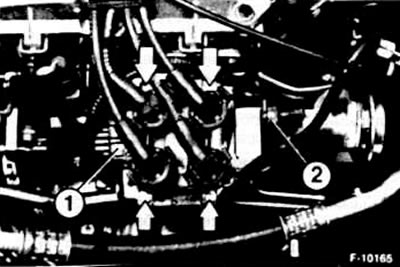
Disconnect all ignition wires from the ignition coil while squeezing the locking tabs on each end. In order to gain access to the ignition coil, you must first remove the air intake hose, see point 5.6.
Check the resistance of the primary winding: to do this, remove the plug -1-, while pressing in the metal clip.

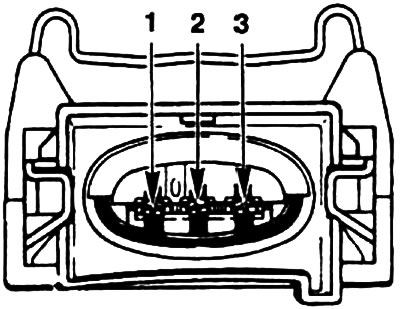
The illustration shows the tip -1- of the ignition coil. Connect an ohmmeter to the appropriate terminals of the ignition coil and check the resistance in sequence between the following terminals:
- between pins 1 and 2.
- between pins 3 and 2.
Set value for two measurements (resistance of the primary winding of the individual ignition coils) 4.5-5.5 ohm.
If significant deviations from the specified value are found, replace the ignition coil.
Replacing the ignition coil
Attention! If necessary, replace the ignition coil. then it must be remembered that in no case should an ignition coil designed for an ignition system with an interrupter be installed.
Unscrew fixing bolts and remove the ignition coil.
Screw on the new ignition coil, connect the side plug.
Connect the ignition wires to the ignition coil, making sure that the locking tabs are engaged.
Attention! Sockets for high voltage wires are marked with numbers from "1" before "4". Connect the wires in accordance with the ignition sequence 1-3-4-2. Cylinder 1 is located on the V-belt side of the engine (looking in the direction of travel - on the right).
Connect ground wire to battery (-). Set your existing clock and set the radio code.
Visitor comments