Engine Gaskets and O-Rings

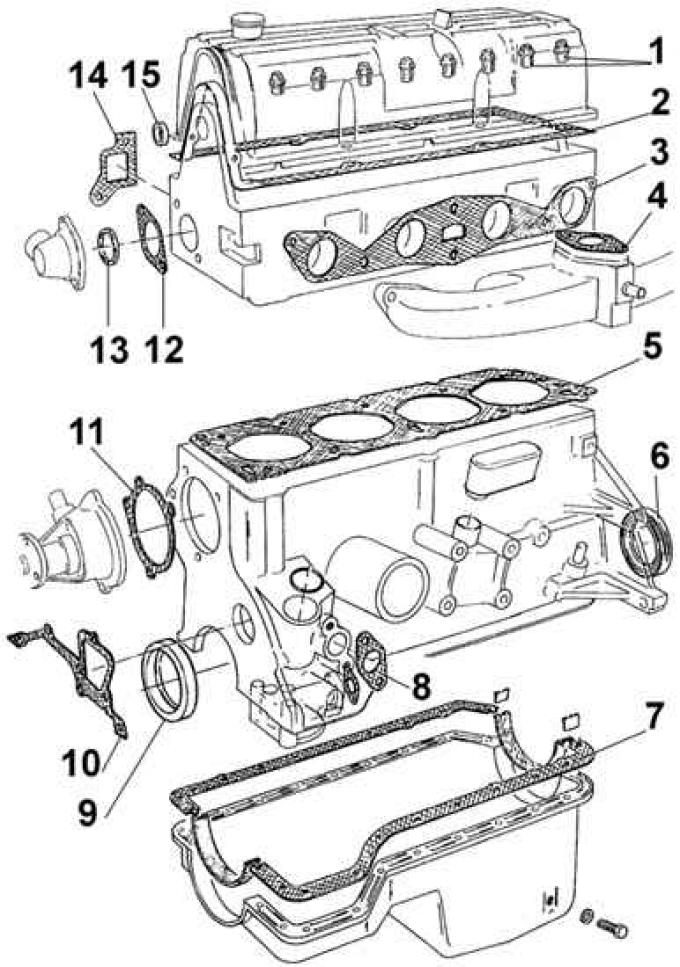
1 - valve stem seals, 2 - head cover gasket, 3 - intake manifold gasket, 4 - carburetor gasket, 5 - head gasket, 6 - crankshaft rear O-ring, 7 - oil pan gasket, 8 - fuel pump gasket, 9 - front crankshaft O-ring, 10 - cylinder head cover gasket, 11 - coolant pump gasket, 12 - thermostat gasket, 13 - thermostat O-ring, 14 - manifold gasket, 15 - camshaft O-ring
Crank mechanism

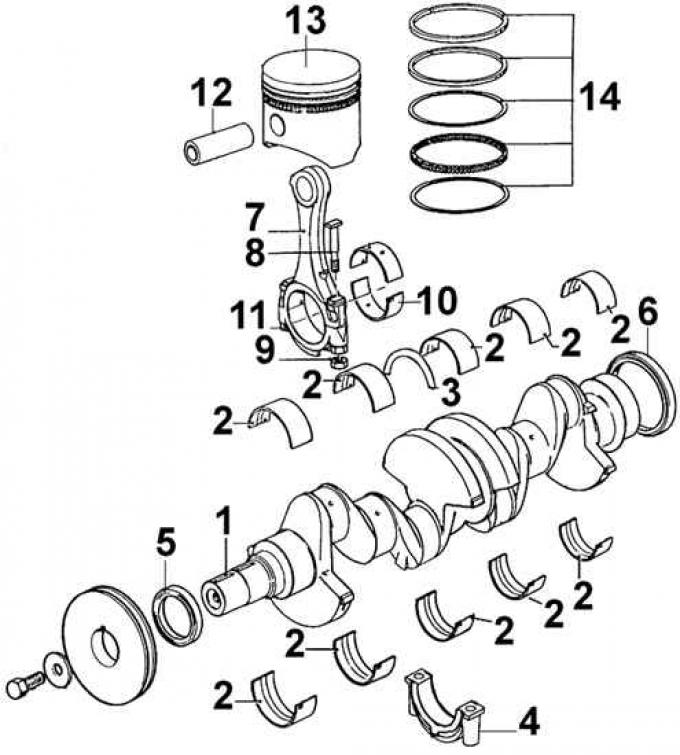
1 - crankshaft, 2 - main bearings, 3 - thrust half rings, 4 - main bearing cap, 5 - crankshaft front O-ring, 6 - crankshaft rear O-ring, 7 - connecting rod, 8 - connecting rod cap bolt, 9 - connecting rod cap fastening nut, 10 - connecting rod bearings, 11 - connecting rod cap, 12 - piston pin, 13 - piston, 14 - piston rings
1. Position the engine on a suitable base.
2. Drain the oil from the oil pan, unscrew the oil filter and remove the oil level indicator.
3. Remove drive gear and clutch disc (indicate the direction of its installation).
4. Unscrew the spark plugs and remove the ignition distributor, marking its position to facilitate subsequent installation.
5. Disconnect vacuum line.
6. Remove toothed belt guard and coolant pump pulley.
7. Remove the cylinder head cover.
8. Remove alternator and fan drive V-belt, and coolant pump pulley.
9. Unscrew the mounting bolts and remove the pulley from the crankshaft.
10. Unscrew and remove the bolt, washer and intermediate shaft pulley.
11. Loosen the toothed belt tensioner, move it against the spring force and lock it in position away from the belt.
12. Remove toothed belt.
13. Remove pulleys from crankshaft (if necessary with puller 21.028), intermediate shaft and camshaft.
Disconnect the fuel line from the carburetor.
14. Unscrew the cylinder head bolts in reverse order to tightening them (see fig. The order of tightening the cylinder head bolts) and remove it along with the intake and exhaust manifolds.
15. Remove the two bolts from the coolant outlet chamber (from cylinder head), remove the set ring and remove the thermostat and gasket.
16. Remove oil pump, tappet and fuel lines.
17. Unscrew the oil pressure sensor and use a screwdriver to remove its sump.
18. Remove oil pan.
19. Remove the front cylinder block cover.
20. Take off (after unscrewing two bolts) intermediate shaft bearing.
21. Using puller 22.036, remove the clutch shaft bearing from the hole in the rear of the crankshaft.
22. Install the pistons at half the height of the cylinders for removal (with a scraper) soot from the top of the cylinders.
23. Tilt the engine to drain the remaining oil from the cylinder block.
24. Remove coolant pump.

25. Remove oil pump (fixture 21.012), and also remove its drive shaft.
26. Check for presence of main bearing designations (on covers and engine block), as well as designations of connecting rod bearings (on rods and covers). If they are not available, mark the bearings with a center punch or indelible pencil.
27. Unscrew the connecting rod bolts, remove their covers, remove the connecting rod bearings and remove the pistons together with the connecting rods from the cylinders.
28. Remove flywheel.
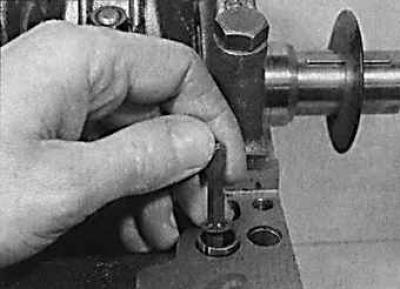
29. Unscrew the bolts of the main bearing caps, remove the main bearing caps and remove the liners.

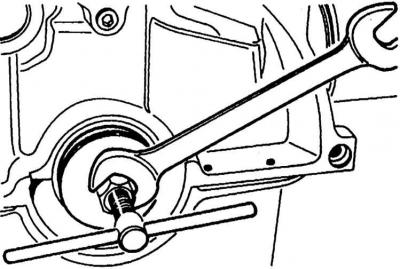
30. Remove the crankshaft and its rear O-ring from the cylinder block using a puller.
31. Remove the crankshaft thrust washers from the middle main bearing.
Visitor comments