Attention: If the coolant is used up as part of a repair, the coolant drained into the container can be used again. In the event that the repair replaces the coolant pump, radiator or cylinder head, the coolant must be replaced with a new one.
Drain
Unscrew the expansion tank cap.
Caution: Remove the cap only when the radiator has cooled down and feels warm to the touch, otherwise there is a risk of burns from hot fluid. For safety reasons, cover the neck of the tank with a thick rag.
Place a clean container under the radiator to drain the coolant.
Fully open the heating valve. To do this, put the temperature control knob in the red zone of the scale.

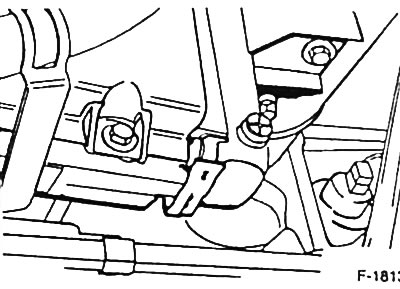
Remove the radiator drain plug and drain the coolant (the picture shows a V6 engine).
Place a clean container to drain the coolant under the crankcase.

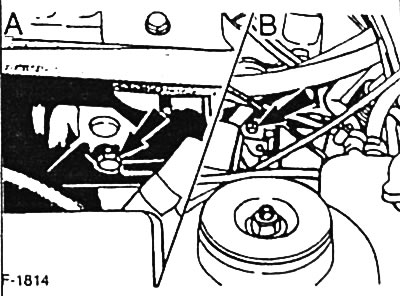
ONS and V6 engines: unscrew the crankcase drain plug and drain the coolant (A: ONS engine; B: V6 engine).
Drain coolant completely.
Flush the cooling system with clean water until the water flows out without turbidity.
Close the radiator drain plug.
ONS and V6 engines: Install crankcase drain plug and tighten to 25 Nm.
Filling
Pour coolant into the expansion tank until no more air bubbles are released.
Pour coolant into the expansion tank up to the MAX mark.
Start the engine and let it run at high engine speed for about 10 minutes. In this case, the engine should warm up to operating temperature. When the engine warms up, observe the coolant level in the expansion tank and top up if necessary.
Close expansion tank cap.
Stop the engine. After the engine has cooled down, check the coolant level in the expansion tank, if necessary top up the level to the MAX mark.
Check the cooling system, especially at the hose connections, as well as at the drain plugs and the coolant pump, for leaks.
Visitor comments