Note: Broken valve springs and defective retainer seals can be replaced without removing the cylinder head. This operation normally requires two special tools and a compressed air source, please read this section carefully before proceeding. If compressed air is not available, nylon rope will be needed to prevent the valves from falling into the cylinders during operation
1. Remove the valve cover from the cylinder head (see section 3).
2. Remove the spark plug from the cylinder in which the valve is faulty. If you are replacing all valve stem seals, remove all spark plugs.
3. Turn the crankshaft so. so that the piston in the selected cylinder stands at TDC on the compression stroke (see instructions in section 5).
If you are replacing all valve stem seals, start with #1 cylinder, then work on cylinders one at a time. Move from cylinder to cylinder in the ignition sequence (1-3-4-2).
4. Screw the adapter into the spark plug hole and connect an air hose from a compressed air source to it.
Note: Many Cylinder Pressure Gauges use screw-in ferrules and can also be used to quickly connect an air hose.
5. Remove the valve lever retainer bolt, valve lever, pivot pin, and push rod from the defective valve. If all seals of the valve stems are changed, then all levers and push rods must also be removed (see section 4).
6. Apply compressed air to the cylinder. Valves must be held in place by air pressure. If the condition of the outer surfaces or valve seats is not satisfactory, then due to leaks, the valves will not be held by pressure - for this case, see the recommendations below.
7. If you do not have access to compressed air, another method can be used. Set the piston to just before TDC on the compression stroke, then thread a long piece of nylon string through the spark plug hole until it fills the combustion chamber. Make sure the other end of the string hangs freely outward so that it can be pulled out easily. Use a large wrench and socket to turn the crankshaft in the direction of rotation until then. until you feel some resistance
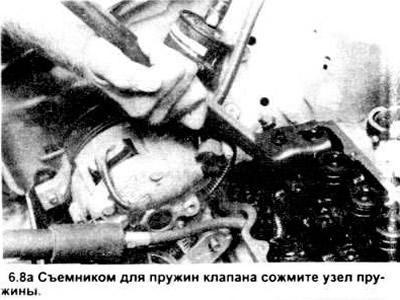
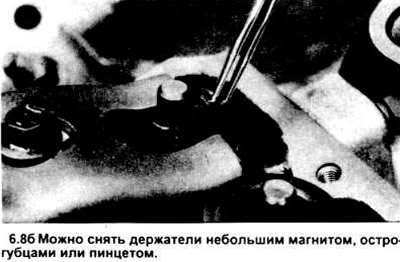
8. Plug the oil return holes in the cylinder heads with a rag to prevent parts from falling into the engine, then compress the spring assembly with a valve spring remover. Remove the crackers with small needle nose pliers, a magnet or tweezers (see picture).


Note: It is possible to use two different types of tools to compress the valve spring without removing the head. One of them covers the lower rings and compresses the rest when the handle is turned, the other (shown in the picture) uses a valve lever retainer bolt as a lever.
9. Remove the spring cap and valve spring assembly and set aside. Use pliers to remove the valve stem seal (see picture) and throw it away.

Note: If there is not enough air pressure to keep the valve closed during operation, then the outer surface or valve seat is most likely damaged. In this case, it is necessary to remove the cylinder head and carry out additional repairs.
10. Wrap duct tape around the top of the valve stem to keep it from falling into the combustion chamber, then relieve the air pressure.
Note: If you used a rope instead of pressurized air, rotate the crankshaft slightly in the opposite direction of its normal rotation.
11. Inspect for possible valve stem damage. Rotate the valve in the guides and watch the end of the eccentric movement, which will indicate that. that the valve is bent
12. Move the valve up and down the guides and check. that he doesn't eat. If the valve stem sticks, then the valve is bent or the guides are damaged. In this case, the head must be removed for repair
13. While pressurizing the cylinder, return the valve to the closed position, then remove the rubber gasket or tape from the valve stem. If you used a rope, turn the crankshaft in the direction of its normal rotation until you feel a slight resistance
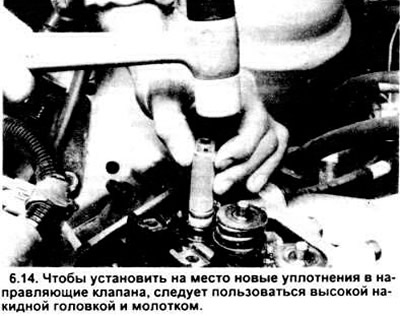
14. Lubricate the valve stem with engine oil and install a new seal on the valve stem. Use a 5/8" socket and hammer to firmly install the seals on the valve guides (see picture). Remember that inlet seals have a wide strip at the base and a ring at the top, and exhaust seals have two rings.

15. Replace the valve spring assembly and carefully place the cotters into the valve stem grooves. Apply a small amount of lubricant to the inside of each cracker to keep them in place
17. Release the pressure of the tool on the spring, make sure that the holders are in place.
18. Disconnect the air hose and remove the adapter from the spark plug hole. If a rope was used instead of air pressure, remove it from the cylinder.
19. As recommended in section 4, install the valve lever and push rod.
20. If you are replacing all seals, repeat the procedure for each valve assembly. Remember that before removing the valve crackers, the piston of each of the cylinders must be set to TDC.
21. Install spark plugs and connect wires.
22. Install valve cover (section 3).
23. Start and warm up the engine, then check for oil leaks and unusual sounds that may come from the valve cover area.
Visitor comments